
To use Starlink, you must mount its dish on your roof. The dish then receives signals from space satellites and connects them to your router. But there is a process to follow.
This article tells you how to position and adjust your Starlink dish. We further guide you on all the dos and don’ts when mounting your dish. Here is the complete guide.
Table of Contents
- How to optimal position the Starlink dish
- How to Position and Adjust Starlink Dish: How to mount the Starlink dish
- The next step is to connect to Wi-Fi.
- How to adjust the Starlink dish? Do I need to aim or move the Starlink dish?
- Frequently Asked Questions (FAQs)
- Conclusion
How to optimal position the Starlink dish
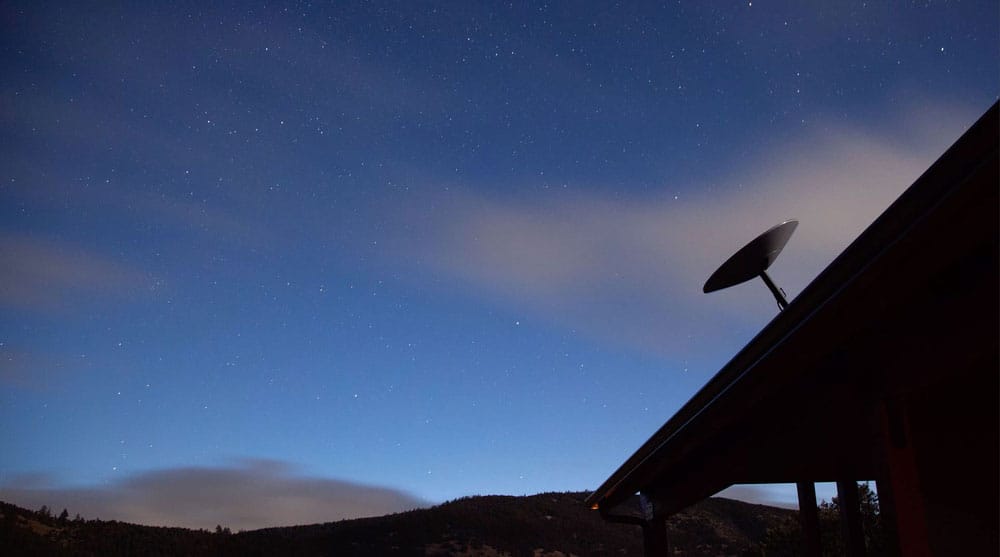
Starlink dish mounted on a clear sky view
The peak of your roof– that’s the optimal position of the Starlink dish. It should be the highest mounting location you have. Trees and other objects act as distractions. So, aim for a higher position away from these.
If you live in an area without tall trees, you can mount your dish at a lower position on the roof. However, you still need to be aware of other obstructions, such as buildings and chimneys.
To save you the hassle, Starlink allows you to check for suitable mounting locations through its Starlink app. Use your phone’s camera to detect any obstructions before you begin the installation process.
How to Position and Adjust Starlink Dish: How to mount the Starlink dish
Starlink dish installed on the roof.
Starlink’s dish is highly sensitive compared to other Satellite services and needs a completely clear view of the sky. Follow these steps to mount your Starlink dish.
- First, assemble everything you need, including the dish and mounting base.
- Next, download the Starlink App. Use this app to check for any obstructions and find the perfect location for your dish, one with a clear sky view.
- Install your dish at an elevated location such as a wall, pole, or, better yet, your roof. You can purchase any additional accessories or mounts from the Starlink shop.
- Now, position your Starlink and plug it into power.
- The dish will level itself automatically and search for satellites. Don’t try to adjust the dish manually.
- After making an initial connection with Satellites (it may take a few minutes), the dish will tilt itself to the optimum angle for the best coverage.
You are done! Check out our article on how to mount Starlink dish for an in-depth guide.
The next step is to connect to Wi-Fi.
- On your device, go to Wi-Fi settings and look for the STARLINK network. Connect to it.
- A browser window will prompt you to enter a new Network name (SSID) and password.
You are now connected to Starlink internet. You can use the app to check your connection and customize any additional settings.
If you are unable to connect to the network, check the following:
- Use the Starlink App to check for obstructions, outages, or alerts.
- Also, confirm that the Wi-Fi router is on (it should light up).
- Check that everything is plugged in correctly and that there are no cables or hardware damaged.
- Finally, unplug and plug in Starlink to perform a power cycle.
If nothing seems to work, contact Starlink Customer Support for assistance.
How to adjust the Starlink dish? Do I need to aim or move the Starlink dish?
Using the Starlink app to check for obstructions
Starlink dish is self-aligning and motorized, meaning that you don’t need to aim it in any way once you’ve installed it. On the contrary, trying to move it manually can result in damaging the internal motors.
When you install the dish, make sure that it can move, spin, and tilt freely on its own. A great way to do this is to ensure that there is lots of space around it, away from chimneys and other obstructions.
Normally, your dish doesn’t need to move or readjust itself regularly. While Starlink satellites will move across the sky, the dish doesn’t need to move to track them. It can adjust the signal without any physical movements.
Frequently Asked Questions (FAQs)
What direction to point the Starlink dish?
The direction to point your Starlink dish will depend on where in the world you are located. However, for most northerners (those in the northern hemisphere), your Starlink dish should point north. Use your Starlink app to tell what direction the sky is completely clear.
Will you need to change the direction of your point to the Starlink dish?
You may only need to move or aim your Starlink dish when you notice buildings and trees obstructing the view. You can use your app to check whether your dish is obstructed and needs moving.
Can the dish move and align itself?
The Starlink dish is self-aligning. During the initial booting, it will use electric motors to move automatically and seek the best orientation. After that, it will rarely align itself again.
Conclusion
Now that you know how to install your Starlink dish, you can do it yourself. Remember to use the Starlink app to check for obstructions before mounting the dish. Feel free to contact Starlink customer service if you encounter any problems.